Tie Tying Tutorials for Novices: A Comprehensive Guide
Are you a novice when it comes to tying a tie? Do you struggle with the complex knot and find it difficult to master? Look no further! In this article, we will provide you with a comprehensive guide on tie tying tutorials for novices. From the basics to advanced techniques, we will cover it all.The Importance of Learning How to Tie a Tie
Tying a tie is an essential skill that every man should possess. Not only does it make you look more put together and professional, but it also shows respect for yourself and others. Whether you're attending a job interview, a formal event, or just want to look stylish, learning how to tie a tie is a must.The Basics of Tie Tying
Before we dive into the tutorials, let's cover the basics of tie tying. A tie is a long, thin piece of fabric that is worn around the neck. It typically has a wide end and a narrow end, and it's secured with a knot. The type of knot you use will depend on the style of tie and the occasion.The Four Main Types of Tie Knots
Tie Tying Tutorials for Novices
Now that we've covered the basics, let's move on to the tie tying tutorials for novices. Below are some step-by-step guides for each of the four main types of tie knots.The Windsor Knot
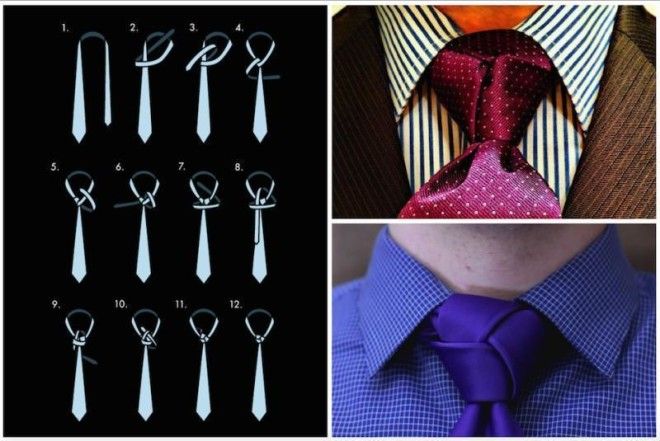
This knot is a bit more complex than the other three, but with practice, you'll be able to master it in no time. Here's a step-by-step guide:The Half Windsor Knot

Furthermore, visual representations like the one above help us fully grasp the concept of Tie Tying Tutorials For Novices.
This knot is similar to the Windsor knot but is smaller and more asymmetrical. Here's a step-by-step guide:- Start by facing a mirror and standing up straight.
- Place the tie around your neck with the wide end on your left side and the narrow end on your right side.
- Cross the wide end over the narrow end, so that it forms an "X" shape.
- Take the wide end and pass it behind the narrow end.
- Bring the wide end up and through the loop that you just created in step 3.
- Take the wide end and pass it behind the narrow end again.
- Bring the wide end up and through the loop again, but this time, only pass it through half of the loop.
- Pull the wide end gently to tighten the knot.
The Four in Hand Knot
This knot is a simple and quick way to tie a tie. Here's a step-by-step guide:- Start by facing a mirror and standing up straight.
- Place the tie around your neck with the wide end on your left side and the narrow end on your right side.
- Cross the wide end over the narrow end, so that it forms an "X" shape.
- Take the wide end and pass it behind the narrow end.
- Bring the wide end up and through the loop that you just created in step 3.
- Take the wide end and pass it behind the narrow end again.
- Bring the wide end up and through the loop again, but this time, only pass it through half of the loop.
- Pull the wide end gently to tighten the knot.
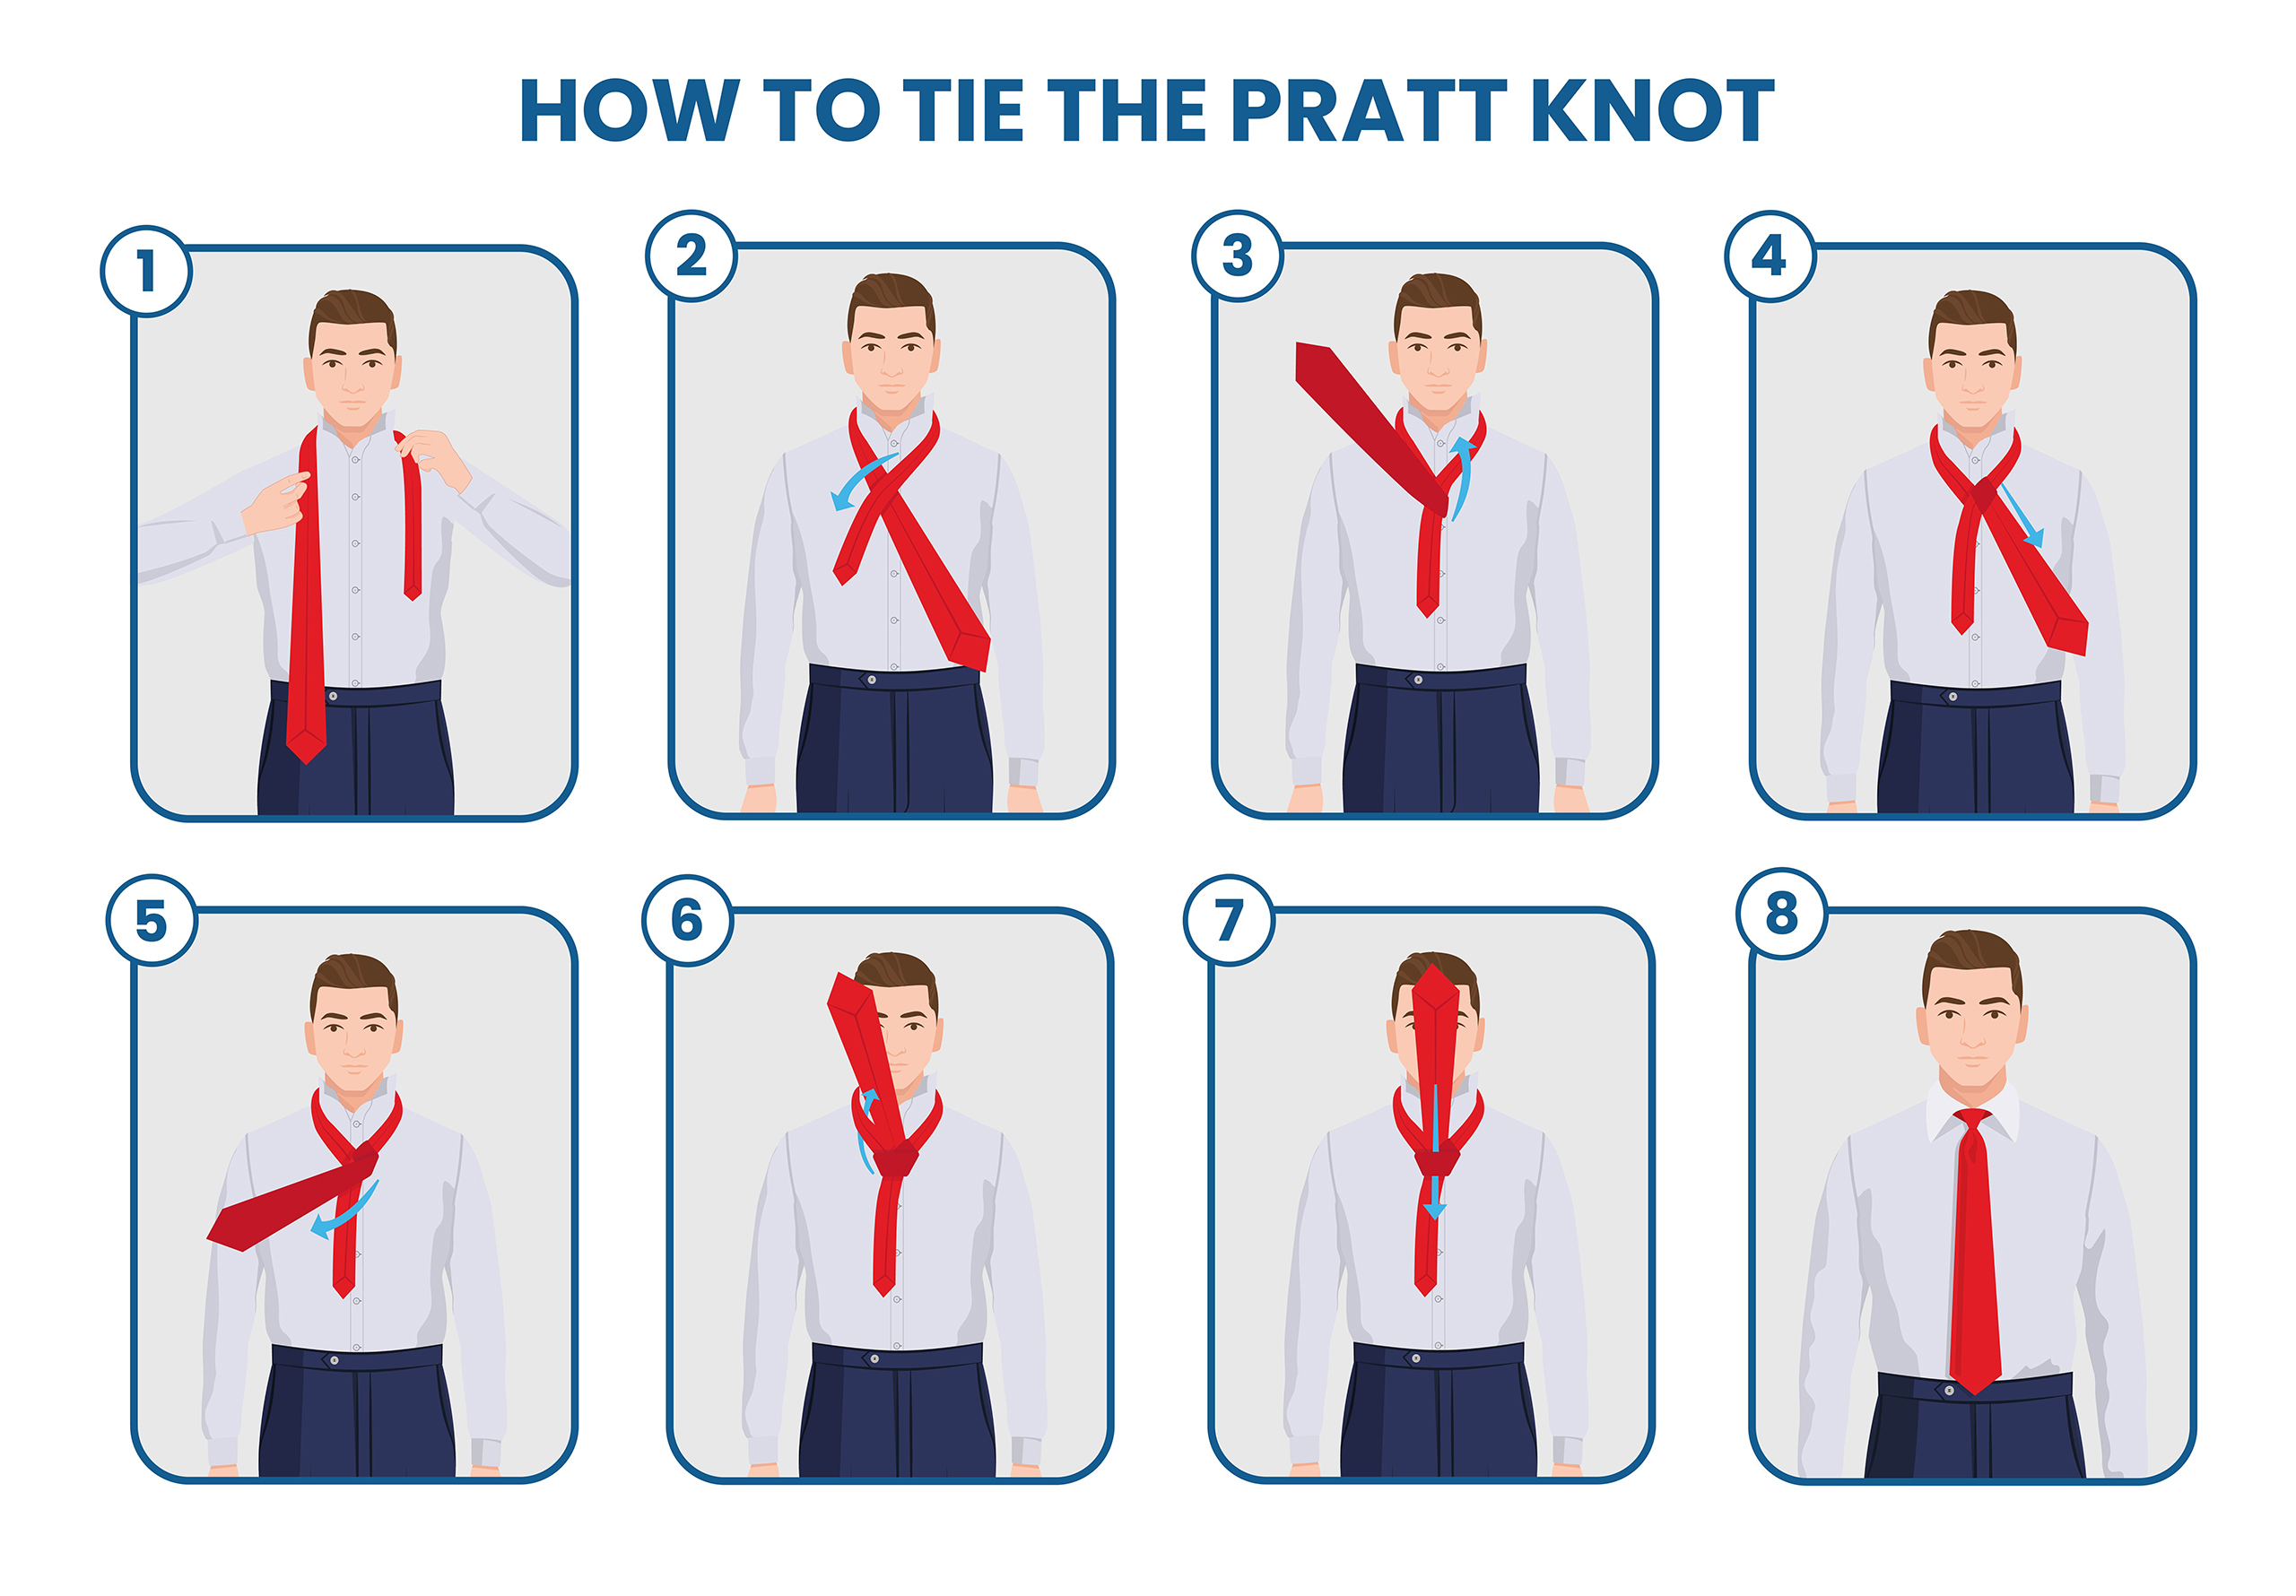
The Pratt Knot
This knot is also known as the Shelby knot and is a simple and stylish way to tie a tie. Here's a step-by-step guide:- Start by facing a mirror and standing up straight.
- Place the tie around your neck with the wide end on your left side and the narrow end on your right side.
- Cross the wide end over the narrow end, so that it forms an "X" shape.
- Take the wide end and pass it behind the narrow end.
- Bring the wide end up and through the loop that you just created in step 3.
- Take the wide end and pass it behind the narrow end again.
- Bring the wide end up and through the loop again, but this time, only pass it through half of the loop.
- Take the wide end and pass it behind the narrow end again.
- Bring the wide end up and through the loop again, but this time, only pass it through half of the loop.
- Pull the wide end gently to tighten the knot.


 - YouTube")


 Windsor knot")
