Preparing Kids for Independence with Shoelaces: A Step-by-Step Guide
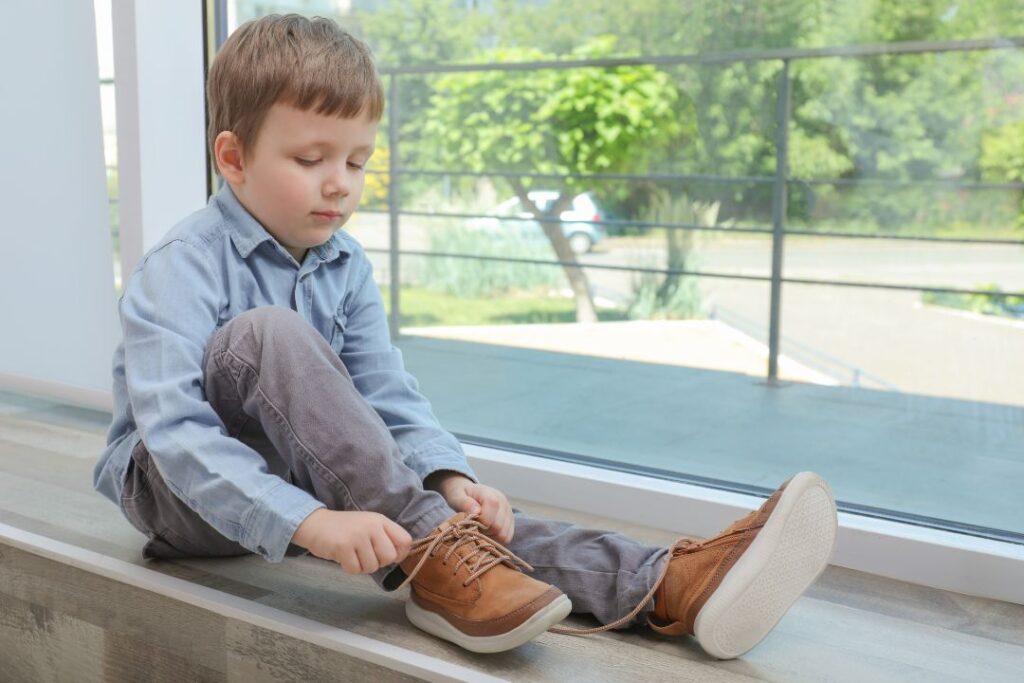
Teaching kids to tie their shoelaces isn’t just about keeping shoes on—it’s one of the most meaningful ways to nurture independence, confidence, and responsibility from an early age. When children learn this foundational skill, they gain a sense of accomplishment that fuels their belief in their own abilities. Preparing kids for independence, starting with shoelace tying, helps lay the groundwork for lifelong self-care and autonomy.Why Learning Shoelace Tying Matters
Mastering shoelaces plays a vital role in a child’s development. It’s more than a daily chore; it’s a complex task combining fine motor skills, hand-eye coordination, and focus. For many children, successfully tying their shoes marks a key milestone in their journey toward self-sufficiency. This accomplishment boosts self-esteem and motivates them to take on bigger challenges. As pediatric occupational therapists emphasize, repetitive tasks like lacing strengthen dexterity—the same skills used in writing, buttoning, and using utensils. Children who learn to tie their shoes independently are better prepared for school routines, taking responsibility for their belongings, and managing personal care with confidence. It empowers them to participate fully in activities that require self-reliance. Every child develops at their own pace, but most show readiness between ages 5 and 7. The best time to begin is when your child can tie a simple overhand knot, perform basic buttoning and zipping, and handle small objects with control. Before introducing laces, assess their grasp on fundamental skills—like scissor use or zipping—so lacing doesn’t become frustrating. Patience is key. If they’re still struggling with these basics, waiting a few months lets foundational skills develop naturally. Rushing the process can lead to frustration, but steady practice, supported by patience and encouragement, honors their learning rhythm.Breaking Down the Shoelace Tying Process
- Hold both laces firmly with one hand while gently crossing the left lace over the right.
- Cross the right lace under the left, then pull through to form an initial loop.
- Take the right lace through the opening formed on the top.
- Cross the left lace over the rightAgain.
- Pull both loops tight, completing the knot.
Fun, Engaging Methods to Teach Shoelace Tying
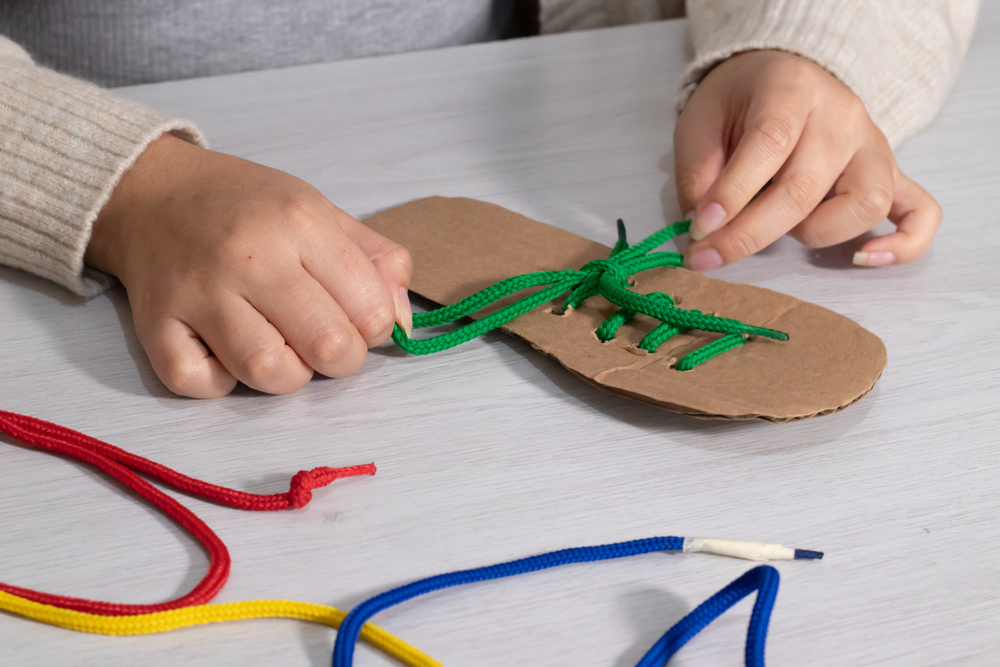
- Use Colorful Shoelaces: Vibrant or patterned laces grab attention and make practice feel more like a game than homework.
- Tie Along with Storytelling: Turn each step into a part of an adventure—“the crossing knot is your secret weapon!”
- Practice With Toys: Use stuffed animals, wooden shoes, or small lacing boards to make repetitive practice fun and low-pressure.
- Visual Aids: Step-by-step images or short video tutorials provide clear visual targets to follow.
- Celebrate Progress: Acknowledge every success—tying one knot, mastering the loop—with praise or small rewards to fuel motivation.
- Use Finger Tracing: Show how to gently push threads through finger loops to build muscle memory.
- Employ Comic Strip Cards: Simple visuals illustrating each step reduce anxiety and clarify expectations.
- Encourage Slow, Focused Practice: Patience helps kids avoid rushing and develop control over movements.
- Offer Adapted Tools: Shoelaces with wider ends or looped-tips simplify handling for small hands.


