Learning how to tie shoelaces is more than just a childhood rite of passage—it’s a life skill that keeps your sneakers, boots, and shoes securely fastened all day long. Whether you’re a parent helping your child, a coach teaching a new athlete, or someone refining their own technique, this step by step guide on shoelaces breaks down everything you need to know, from basic knots to advanced lacing styles. Let’s explore how to master this simple yet essential task with clear instructions and practical tips.
Why Mastering Shoelace Tying Matters
Before diving into how to tie shoelaces step by step, understand that unlaced or poorly tied laces can quickly turn into a frustrating habit. Tripping over loose shoelaces is common—and embarrassing. More seriously, slipping shoelaces frequently can lead to injuries or scrapes, especially on bike rides or sports. That’s why learning the step by step guide on shoelaces isn’t just about looking neat; it’s about safety, confidence, and consistency. This foundational skill benefits everyone, from toddlers taking their first steps to adults who value functionality in every pair of shoes.The Basics: Tools and Prep
Start by gathering a short pair of laces—think classic sneaker laces, dress shoe cords, or kids’ color-coded shoelaces. These typically measure 30 to 40 inches (75–100 cm) when untied, providing enough slack for secure knotting. Ensure your shoes are clean and dry, with laces not kinked or frayed. Untie the existing laces slightly (leave 6 inches outside) to give you room to work. This preparation step ensures every movement is smooth and intentional—key when following our step by step guide on shoelaces.Mastering the Standard Knot Method
- Step 1: Open the laces—loosely uncross the two strands so they form an "X" over the shoe eyelets.
- Step 2: Take one lace (the left one) and pass it under the crossing point, then up through the top loop on the opposite side.
- Step 3: Pull tight gently—loop the right lace over the wrapped left lace to form a small underhand knot.
- Step 4: Slide the knot toward the shoe heel, tucking the loose ends neatly to form a clean, compact bow.
- Step 5: Use your fingers to shape the bow—circle it tightly but not too stiff, ensuring the laces hold but remain flexible.
Introducing the Bunny Ears Method (Great for Kids & Beginners)
This playful, easy-to-remember technique is perfect for young learners or those building confidence.
- Step 1: Take each lace and clip a small section near the ends, forming two small "ears" on each side.
- Step 2: Cross the laces over each other, then pull one ear under the crossing point and around to the back—this makes the "bunny ear."
- Step 3: Wrap the opposite ear similarly, pulling tight to form a neat bow.
- Step 4: Adjust the shape into a bow; small kids love this method because it feels like "dressing" their shoes.
Top Lacing & Heel Lock Hacks
If you want extra security or style, try:
- 5 Easy Methods for TyrecShoelaces: From the standard knot to bunny ears and everything in between, master timing, tension, and knot reviews to suit your lifestyle.
- Double Knot Technique: Tie a standard knot, then double it over for double security—ideal for sports or hiking.
- Heel Lock Lacing
: This method keeps laces from shifting by threading them through the heel counter; a favorite for sneakerheads.
- Safety First Lacing: Use sliding knots or micro-techniques to prevent accidental loosening during intense play.
Common Mistakes to Avoid
Even with clear instructions, beginners often repeat errors. Watch out for:
- Step 1: Take each lace and clip a small section near the ends, forming two small "ears" on each side.
- Step 2: Cross the laces over each other, then pull one ear under the crossing point and around to the back—this makes the "bunny ear."
- Step 3: Wrap the opposite ear similarly, pulling tight to form a neat bow.
- Step 4: Adjust the shape into a bow; small kids love this method because it feels like "dressing" their shoes.
Top Lacing & Heel Lock Hacks
If you want extra security or style, try:- 5 Easy Methods for TyrecShoelaces: From the standard knot to bunny ears and everything in between, master timing, tension, and knot reviews to suit your lifestyle.
- Double Knot Technique: Tie a standard knot, then double it over for double security—ideal for sports or hiking.
- Heel Lock Lacing : This method keeps laces from shifting by threading them through the heel counter; a favorite for sneakerheads.
- Safety First Lacing: Use sliding knots or micro-techniques to prevent accidental loosening during intense play.
Common Mistakes to Avoid
Even with clear instructions, beginners often repeat errors. Watch out for: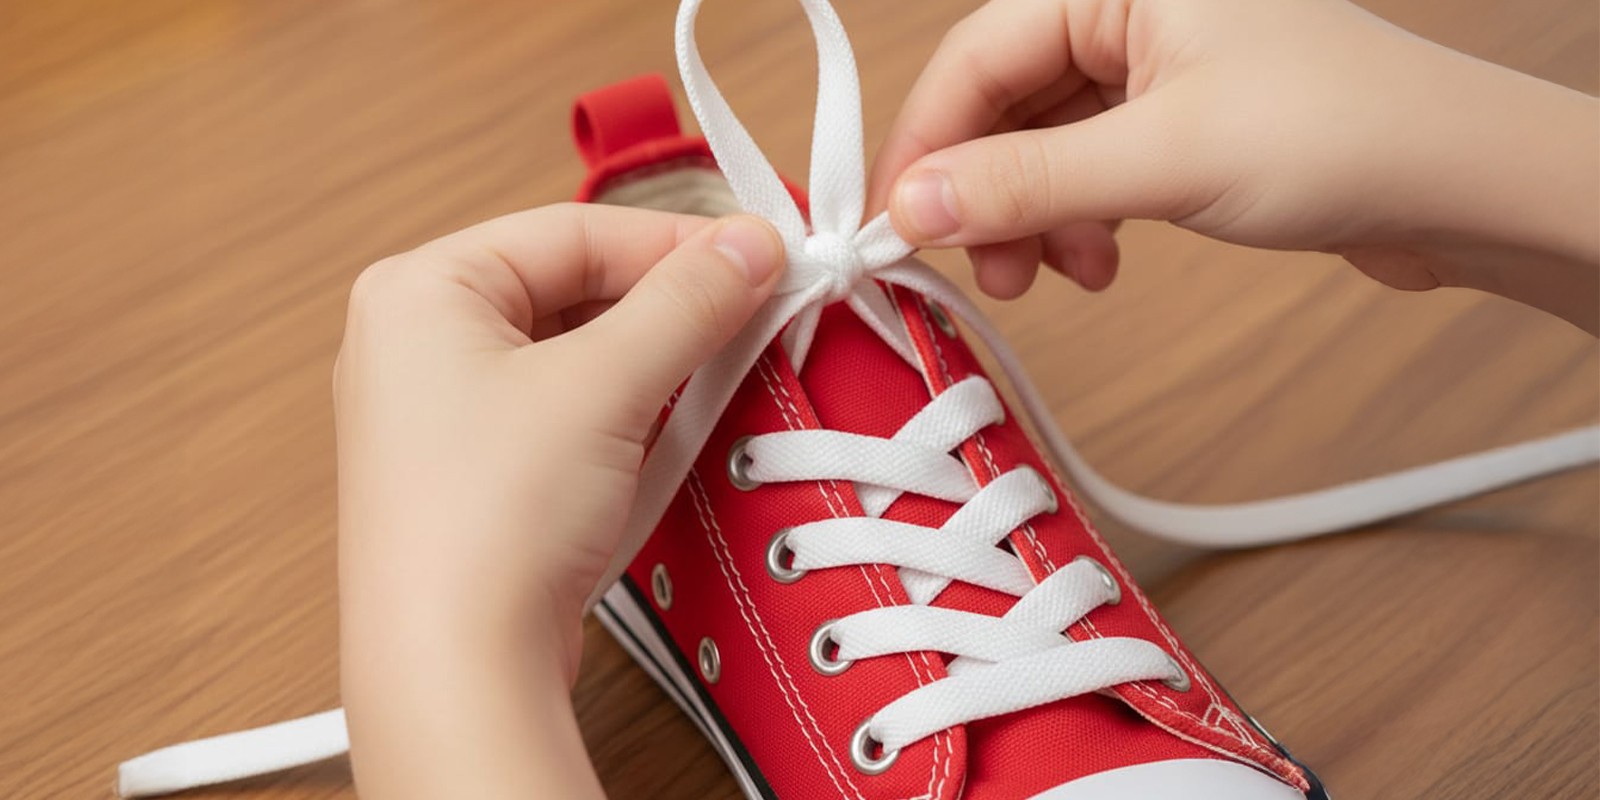
Moving forward, it's essential to keep these visual contexts in mind when discussing Step By Step Guide On Shoelaces.
• Forgetting to tuck ends neatly inside—loose laces cause slipping.
• Skipping the crucial step of sliding knots forward to reinforce tension.
• Using natural laces that stretch loose—opt for round-core memory laces for stability.
Our step by step guide on shoelaces emphasizes finesse over speed—practice builds confidence and precision.
Advanced Tips from Shoe Experts

Furthermore, visual representations like the one above help us fully grasp the concept of Step By Step Guide On Shoelaces.
For those ready to take lacing to the next level, try these pro hacks:- Symmetrical Tension: Keep both sides even for visual balance and reduced wear.
- Anti-Slip Knots: Learn how to wrap the lace ends inside once tied to prevent untying.
- Custom Lacing Charts: Tailor patterns for width, arch support, and foot shape—especially useful for k whisk training or orthotics.
Teaching Kids to Tie Shoelaces: A Step-by-Step Approach
Turn lacing into a fun bonding experience. Use short, clear instructions and visual aids like colorful laces or step-by-step pictures. Focus on repetition: practice first every morning, then after school. Celebrate small wins—every tighter knot earns praise. With the step by step guide on shoelaces, teaching kids becomes a stress-free routine, not a struggle. Over time, you’ll see their confidence grow—and so will their shoelaces staying secure all day.Whether you’re rediscovering this skill or introducing it to a child, mastering how to tie shoelaces opens doors to independence, style, and safety. With practice, repetition, and the right guidance from our detailed step by step guide on shoelaces, every shoe will stay tied firmly—fast, secure, and seamless.

")

 - NYCMode")


")


