Leaky PEX Pipe Repair And Replacement: A Comprehensive Guide
As a homeowner, you understand the importance of a fully functional plumbing system. Leaky PEX pipes, in particular, can be a cause for concern. Not only can they lead to increased water bills, but they can also result in costly damage to your property. In this article, we will provide you with a step-by-step guide on how to repair and replace leaky PEX pipes, including the necessary tools and precautions.
Common Causes of Leaky PEX Fittings
PEX pipes are prone to leaks due to various reasons. Some of the most common causes include:
- Incorrect installation
- Loose connections
- Worn-out O-rings
- Improper PEX tubing
- Aging pipes
How to Identify Leaky PEX Pipes
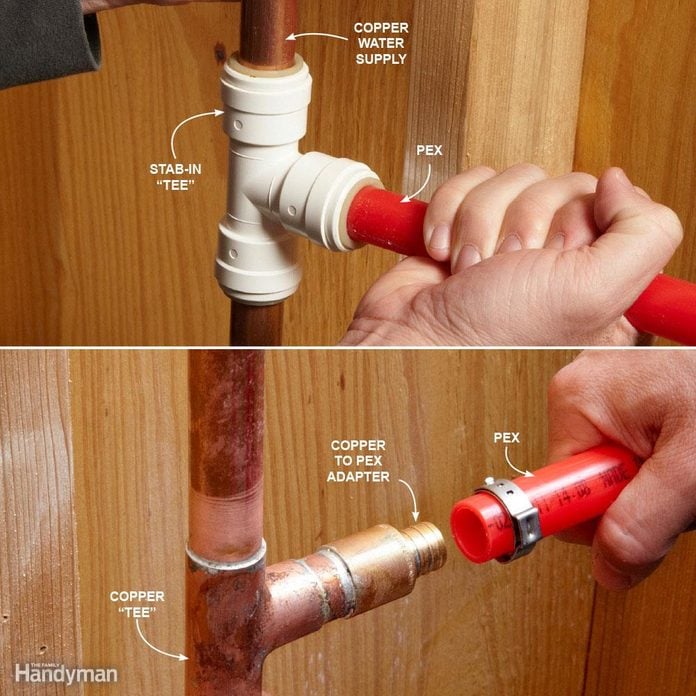
As we can see from the illustration, Leaky Pex Pipe Repair And Replacement has many fascinating aspects to explore.
Identifying leaky PEX pipes can be a bit tricky, but there are some signs to look out for:
- Water spots or stains on walls, ceilings, or floors
- Dripping sounds or running water
- Unusual odors
- Increased water bills
- Mineral buildup
Tools and Materials Needed
To repair or replace leaky PEX pipes, you will need the following tools and materials:
- PEX crimp tool
- PEX deburring tool
- PEX cutter
- PEX socket
- PEX tubing
- PEX adapter fittings
- OLSyrup Degreaser
- Pipe tape or pipe dope
- Wire brushes
- Lead shields
- Richard Pipe 501 or similarWorks Pipe Revietilet
Moving forward, it's essential to keep these visual contexts in mind when discussing Leaky Pex Pipe Repair And Replacement.
Repairing Leaky PEX Pipes
Step 1 - Cut Out the Damaged Section
Use a PEX cutter to remove the damaged section of the pipe. Be careful not to damage the surrounding pipes.
Measure the length of the replacement PEX tube and cut it to size using a PEX cutter.
Step 3 - Debur the Pipe

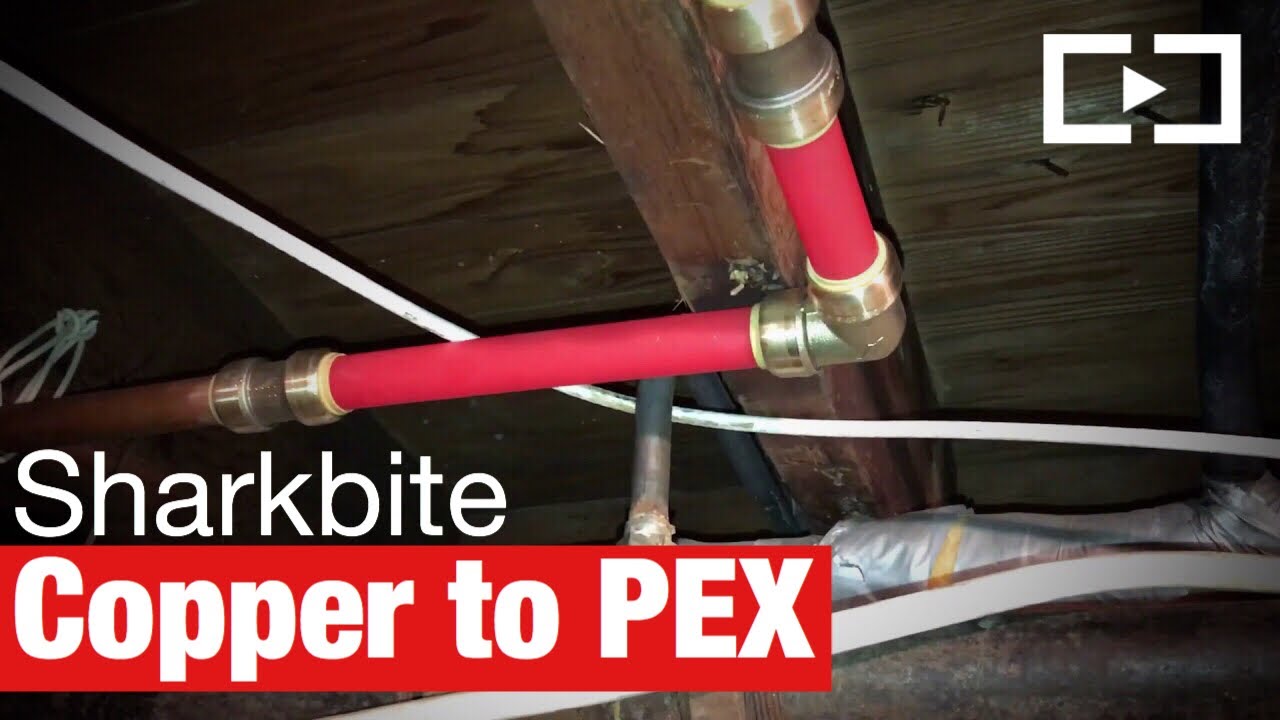
As we can see from the illustration, Leaky Pex Pipe Repair And Replacement has many fascinating aspects to explore.
Use a deburring tool to smooth out the pipe and remove any rough edges.
Step 4 - Crimp the PEX Tube
Use a PEX crimp tool to crimp the PEX tube onto the pipe socket. Tightening the crimp will ensure a secure connection.
Step 5 - Test the Connection
Turn on the water supply and test the connection for leaks.
While DIY repair is possible, there are situations where it's best to call a professional plumber:
- Extensive or hidden leaks
- Mold or extensive water damage
- A systemic problem requiring a complete replacement
- Multiple leak locations along the same pipe
Professional plumbers have the necessary expertise and equipment to perform complex repairs and replacements. Don't hesitate to call for help if you're unsure about how to proceed.
PEX pipes offer numerous benefits, including:
- Increased durability and longevity
- Reduced risk of leaks
- Improved water flow
- Cost-effective alternative to traditional piping materials
- Increased choice of fittings and connections
- Resistant to freezing temperatures
- Can be used with environmentally friendly materials
Leaky PEX pipes can be a cause for concern, but with the right tools and knowledge, you can repair or replace them effectively. Remember to follow the necessary precautions and safety guidelines to avoid water damage and costly repairs. If you're unsure about how to proceed, don't hesitate to call a professional plumber. In the long run, repairing or replacing leaky PEX pipes will save you time, money, and stress.


/PinholeLeaksonCopperPipe-565c96af5f9b5835e476dc17.jpg "5 Practical Steps for Effective Leak Detection and Repair")


:max_bytes(150000):strip_icc()/installing-pex-tubing-2718684-05-5168b956d9a8496196c9c33e90c773c4.jpg "Master the Art of PEX Pipe Repair: Step-by-Step Guide for Beginners")


