G Network Settings for Advanced Computing PC: A Comprehensive Guide
In today's fast-paced world of advanced computing, accessing the right network settings can make all the difference between a seamless user experience and a frustrating connectivity issue. The are crucial for troubleshooting, configuring custom network parameters, and setting up complex network environments. In this article, we'll delve into the nitty-gritty of advanced network settings, exploring the best practices and settings for optimal performance.Accessing Advanced Network Settings in Windows 11
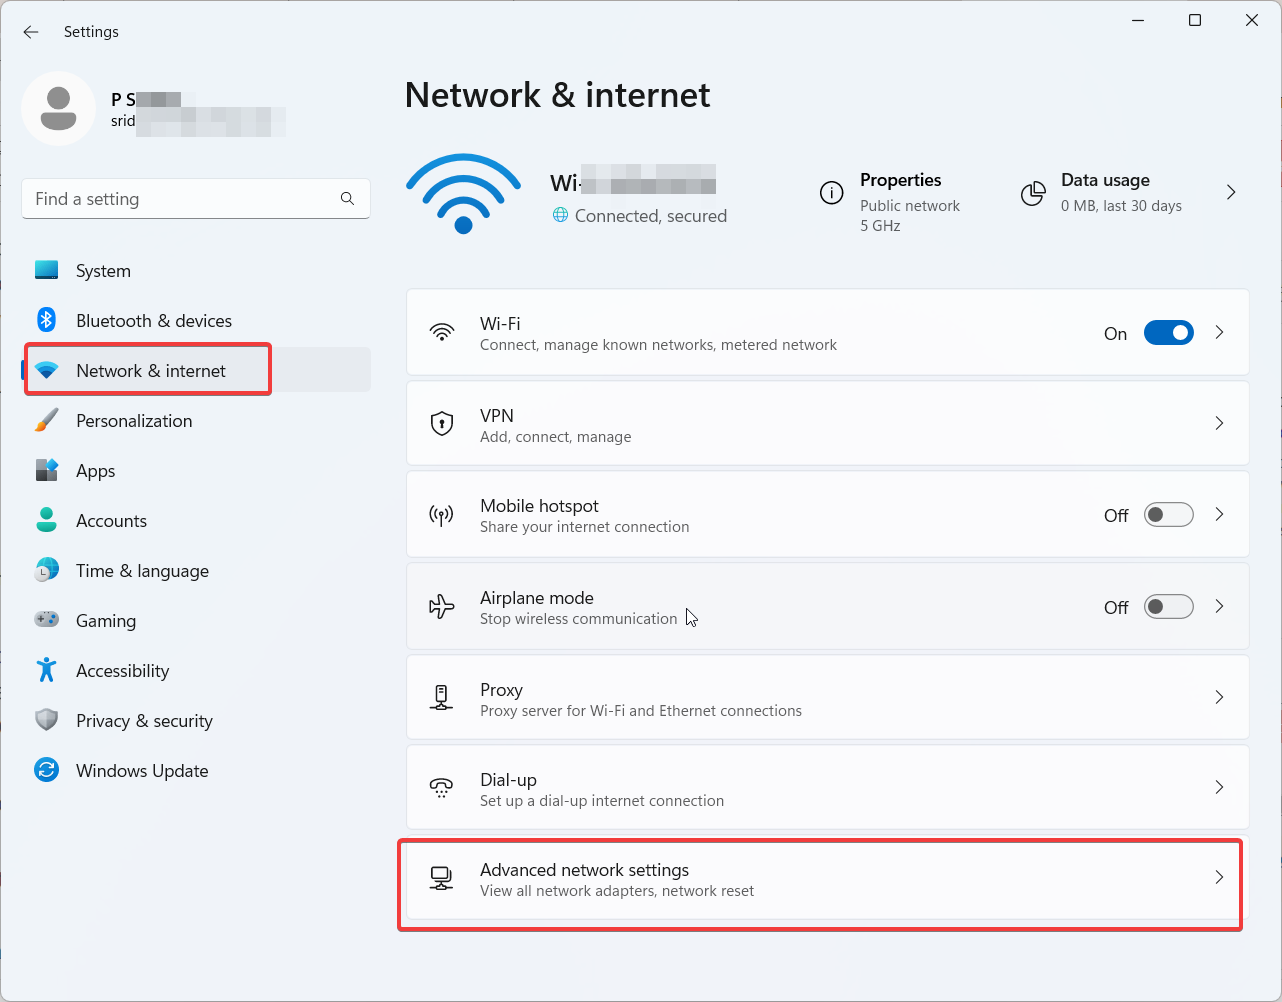
Before we dive into the specifics of G Network Settings, let's cover the basics. To access advanced network settings in Windows 11, follow these steps: 1. Press Win + I
As we can see from the illustration, G Network Settings For Advanced Computing Pc has many fascinating aspects to explore.
to open the Windows Settings panel. 2. Navigate to the Network & Internet section. 3. Click on the Advanced network settings menu. Alternatively, you can use thems-settings:network-advancedsettings function to open the Advanced Network Settings section in Windows 10 and 11.
Optimizing Network Adaptor Settings
ncpa.cpl and press Enter to open the Network Connections window.
3. Right-click on your active network and select Properties.
4. Click on Configure and navigate to the Advanced tab.
5. Adjust the network settings as listed below to configure them for optimal performance:
- Set the Duplex setting to Full Duplex for maximum bandwidth efficiency.
- Enable the "ITU-T G.729" option for low latency and high-quality voice and video streaming. li>Disable the "L2TP over IPsec" option if not required, as it can cause connectivity issues.


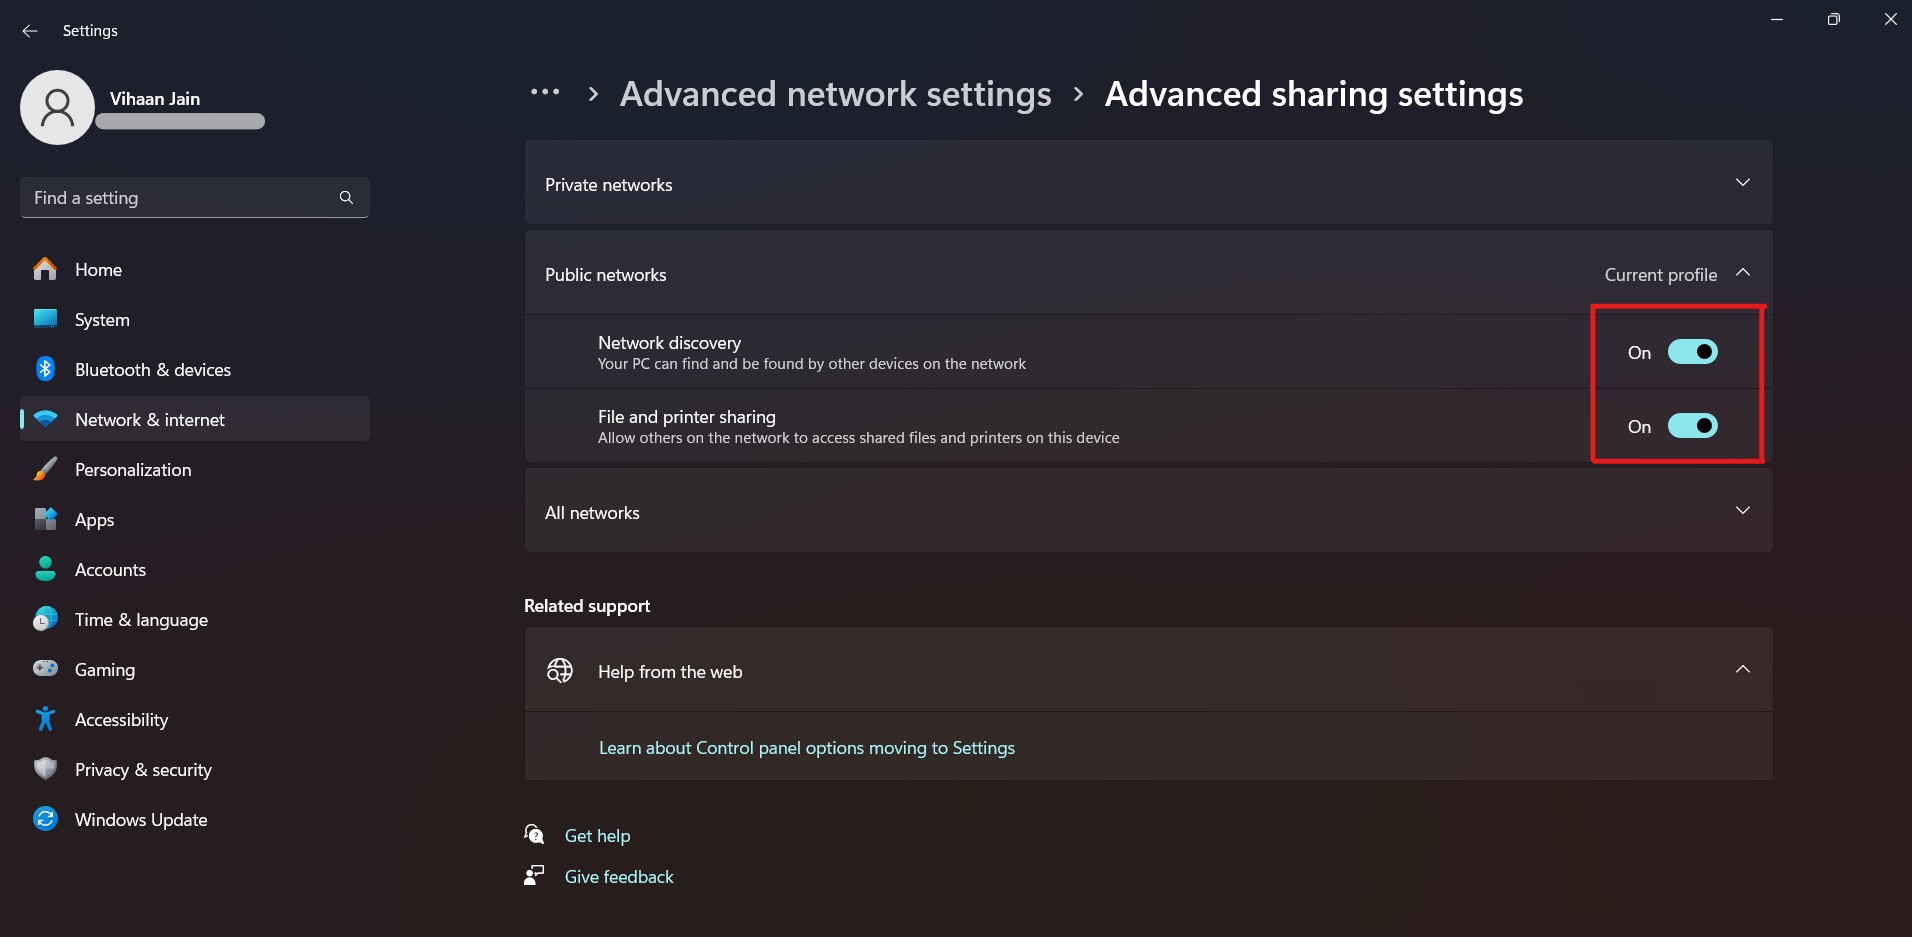
:max_bytes(150000):strip_icc()/turn-on-network-discovery-and-file-sharing-windows-11-ec507db16dd94081b34df8a7fa57a6cd.png "Computer Network Tutorial - GeeksforGeeks")


